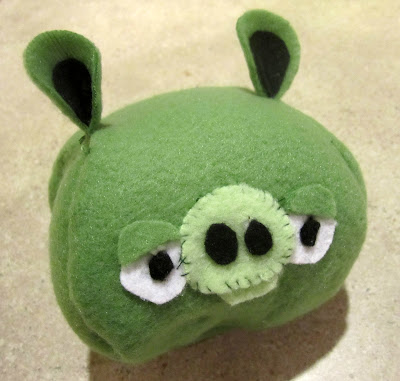
OK, so he's not nearly as cool as the crocheted version. But he was quick (60 - 90 minutes) and easy, and Very cheap as everything came from my stash.
He's also about the same size as my crocheted birds - roughly 4 or 5 inches wide and tall.
I have it in the back of my head to make several more and create a live-version game for my kid's upcoming 3rd birthday...
If you'd like to make your own, here's how!
Materials
1. Medium Green fleece, at least 8 x 12 inches. I used a Dollar Tree fleece blanket from the baby aisle. (You could also use ordinary felt.)
2. Felt or Fleece scraps in light green, black, and white
3. Needle and Thread or Sewing Machine
4. Fiber-Fill
5. (Optional) Glue
6. (Optional) Beans or Rice for weight
Instructions
0. Put babies to bed. This is going to take a little time and concentration! ;)

1. Create a pattern. The easiest way to sew a basic ball shape is to use a baseball pattern, consisting of two identical figure-eight shaped pieces. I was going to try to eyeball it, but thankfully I did a quick search and found this tutorial on wikiHow.
I only did a couple of things differently. First, I made a pattern using a piece of paper so I could make additional piggies. Second, when I rounded the edges, I used the edge of my round object (the peanut butter lid) to get a nice, accurate curve. Finally, when I cut the pattern out, I first carefully folded it into quarters (length and width-wise) so it would be symmetrical.

2. Pin the pattern to your fleece or felt, or trace around it, and cut 2.
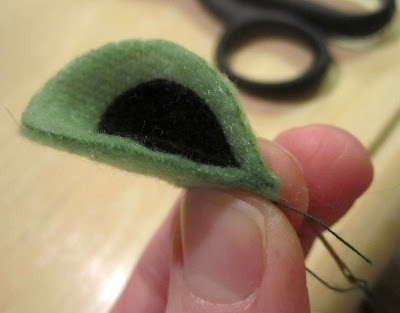
3. Cut nose, eyes, and ear pieces out of scrap felt and fleece.
I eyeballed everything, which worked out fine because the piggy faces in the game are frequently slightly asymmetrical. But feel free to be more careful and exact than I was! :)
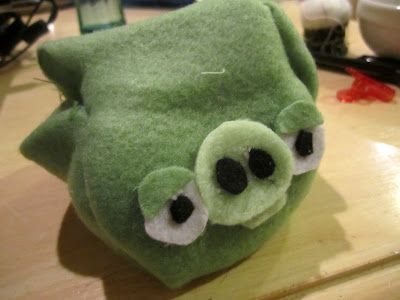
I went ahead and glued the face to one of the round ends of my figure eights. However, it could just as easily have waited until after I'd sewn the ball. The advantage of waiting is you'll have a better idea of exactly where you want to place the face, but if you're going to stitch, it's easier to do when you have access to both sides of the fabric. In my case, I glued everything 'cause I was lazy. I did add some stitching to the nose after sewing the rest of the item, just for extra strength.

4. Carefully fold your fleece figure eights together and pin the *wrong sides* together.
4b. Optionally, pin your ears into the seams near the top of the face - making sure that they are pointing inside (that is, to the right side) of the piggy.
I did not do this, because I had not decided exactly where to place them when I started. Most pictures of the piggies show them a little close together than the side seams will put them. However, the seam is by far the easiest place to sew them in, because the seam is easier to hide and they are easy to set upright. If you attach them elsewhere, you might have to experiment with the shape of the ear base. You could possibly snip a very short notch in the exact center of the ear base, creating two flaps that could be stitched down separately. Or, just put 'em in the seam like I did!

5. Sew the edges together either by hand or by machine, being sure to leave 1-2 inches at the end for turning right-side out and stuffing.
Turn him right-side out.
6. Optionally, add a handful of rice or dried beans to the bottom of your piggy to give him some weight.
7. Stuff piggy with fiber-fill
8. Using the ladder stitch, close the remaining gap.
(Note: The link above is to a fairly simplistic diagram of the ladder stitch, which is the best I could find on short notice. If you need extra pointers, I recommend searching YouTube for a better tutorial.)
If you haven't sewn on your ears yet, do so now.
And there he is! Whip up some fowl foes, and have yourself a little target practice!


No comments:
Post a Comment